
Create your first Krynia workspace
Create a real Krynia workspace, name the company boundary, review access and invite one teammate with the right role before adding sources.
5 minutes
What you'll achieve
Your team has a real workspace with clear access boundaries instead of demo data.
Create the workspace
- 1
Open Sign in and continue with your company Google or Microsoft identity.
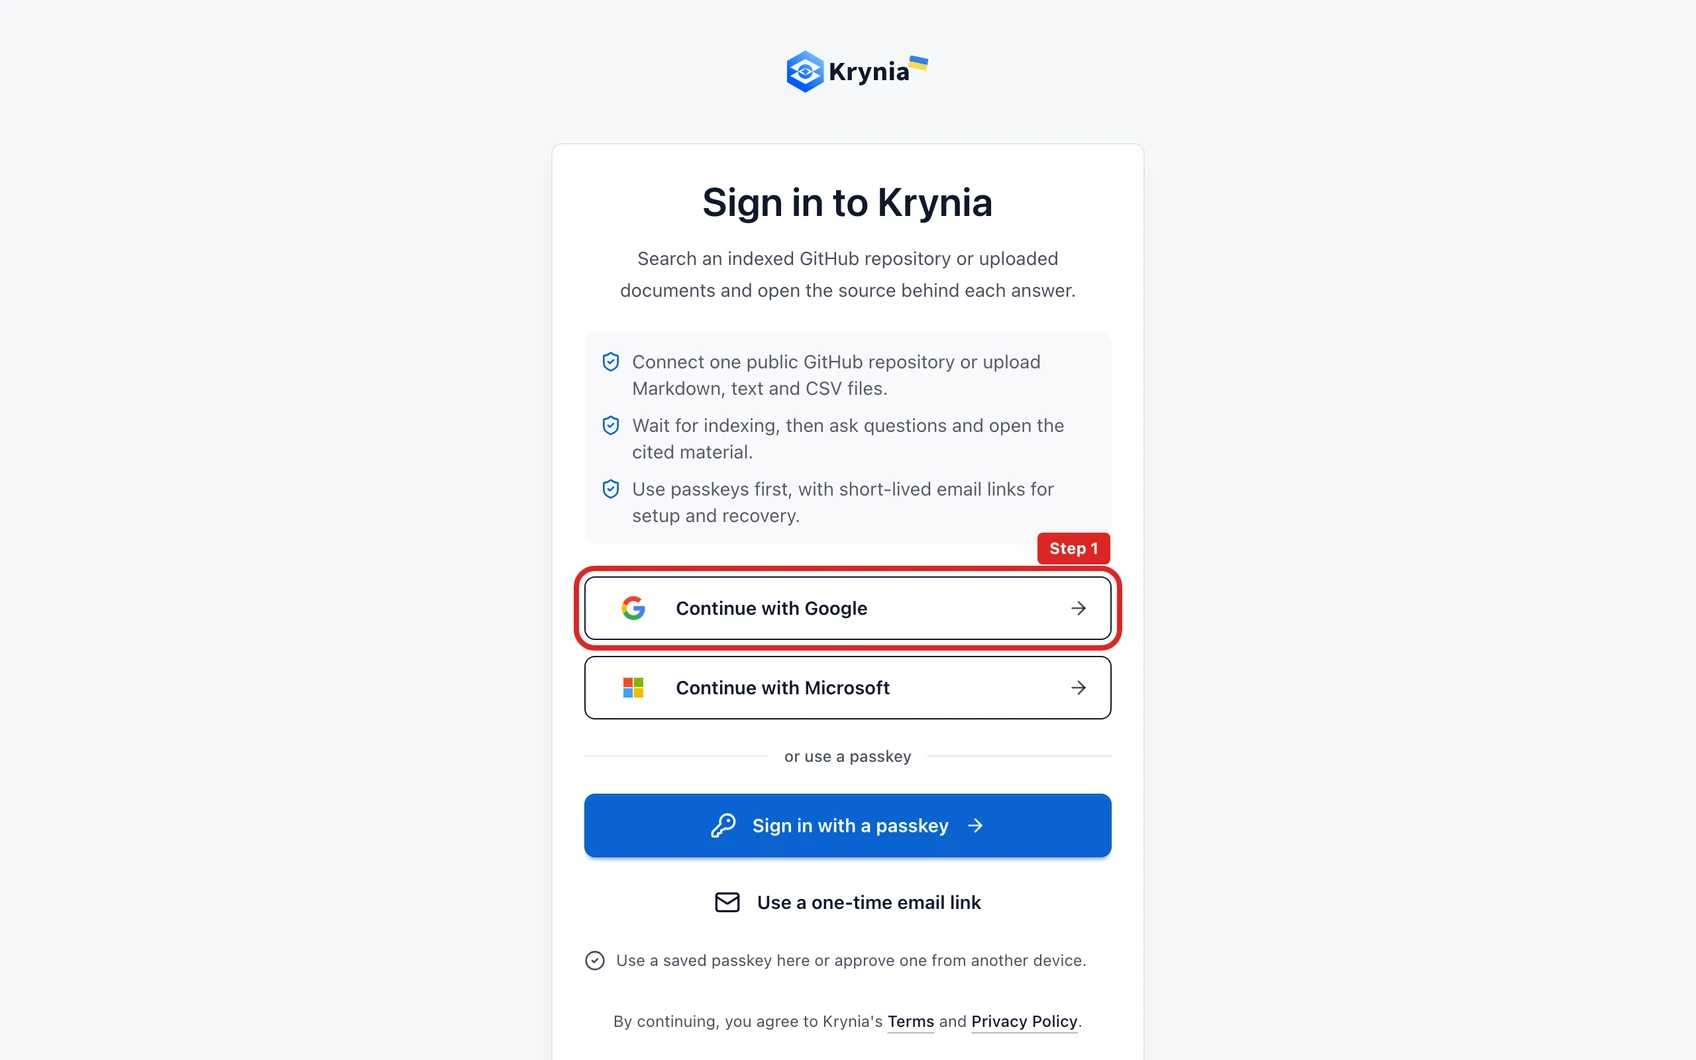
The red outline shows the control or area used in this step. - 2
Enter the company or team name that teammates will recognize.
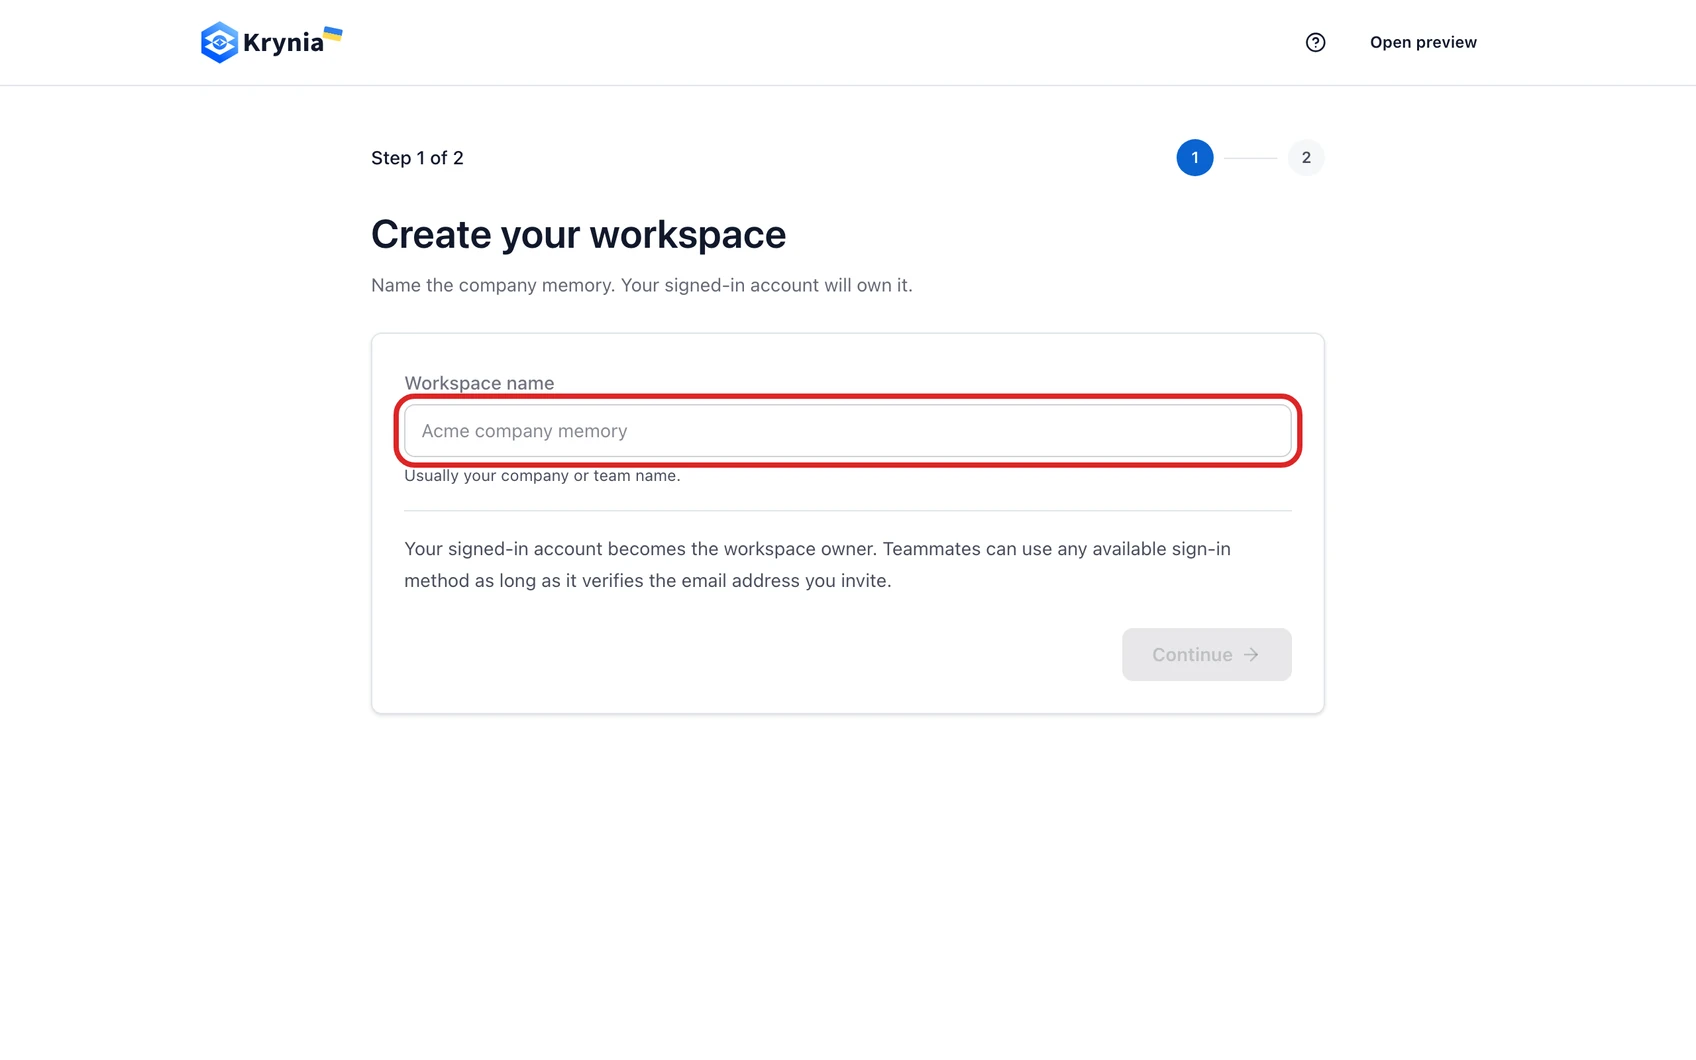
The red outline shows the control or area used in this step. - 3
Create the workspace, then confirm you are in the real app rather than the public demo.
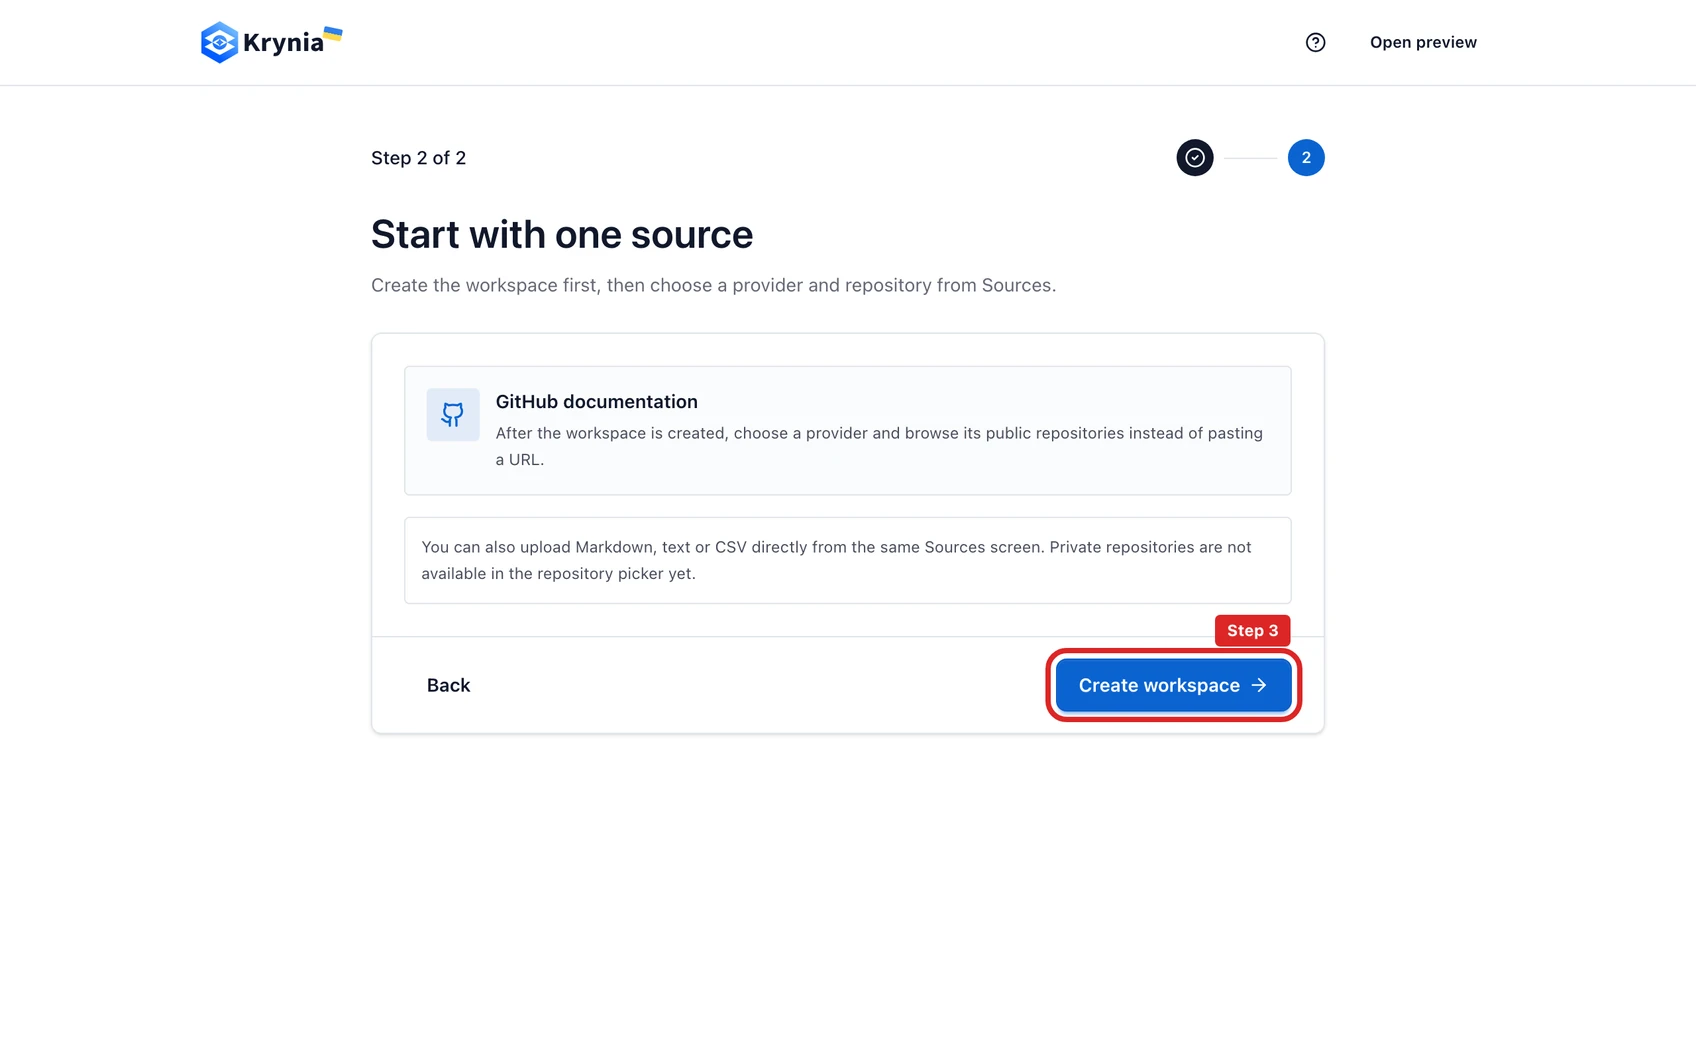
The red outline shows the control or area used in this step. - 4
Open Settings and review workspace access before inviting the wider team.
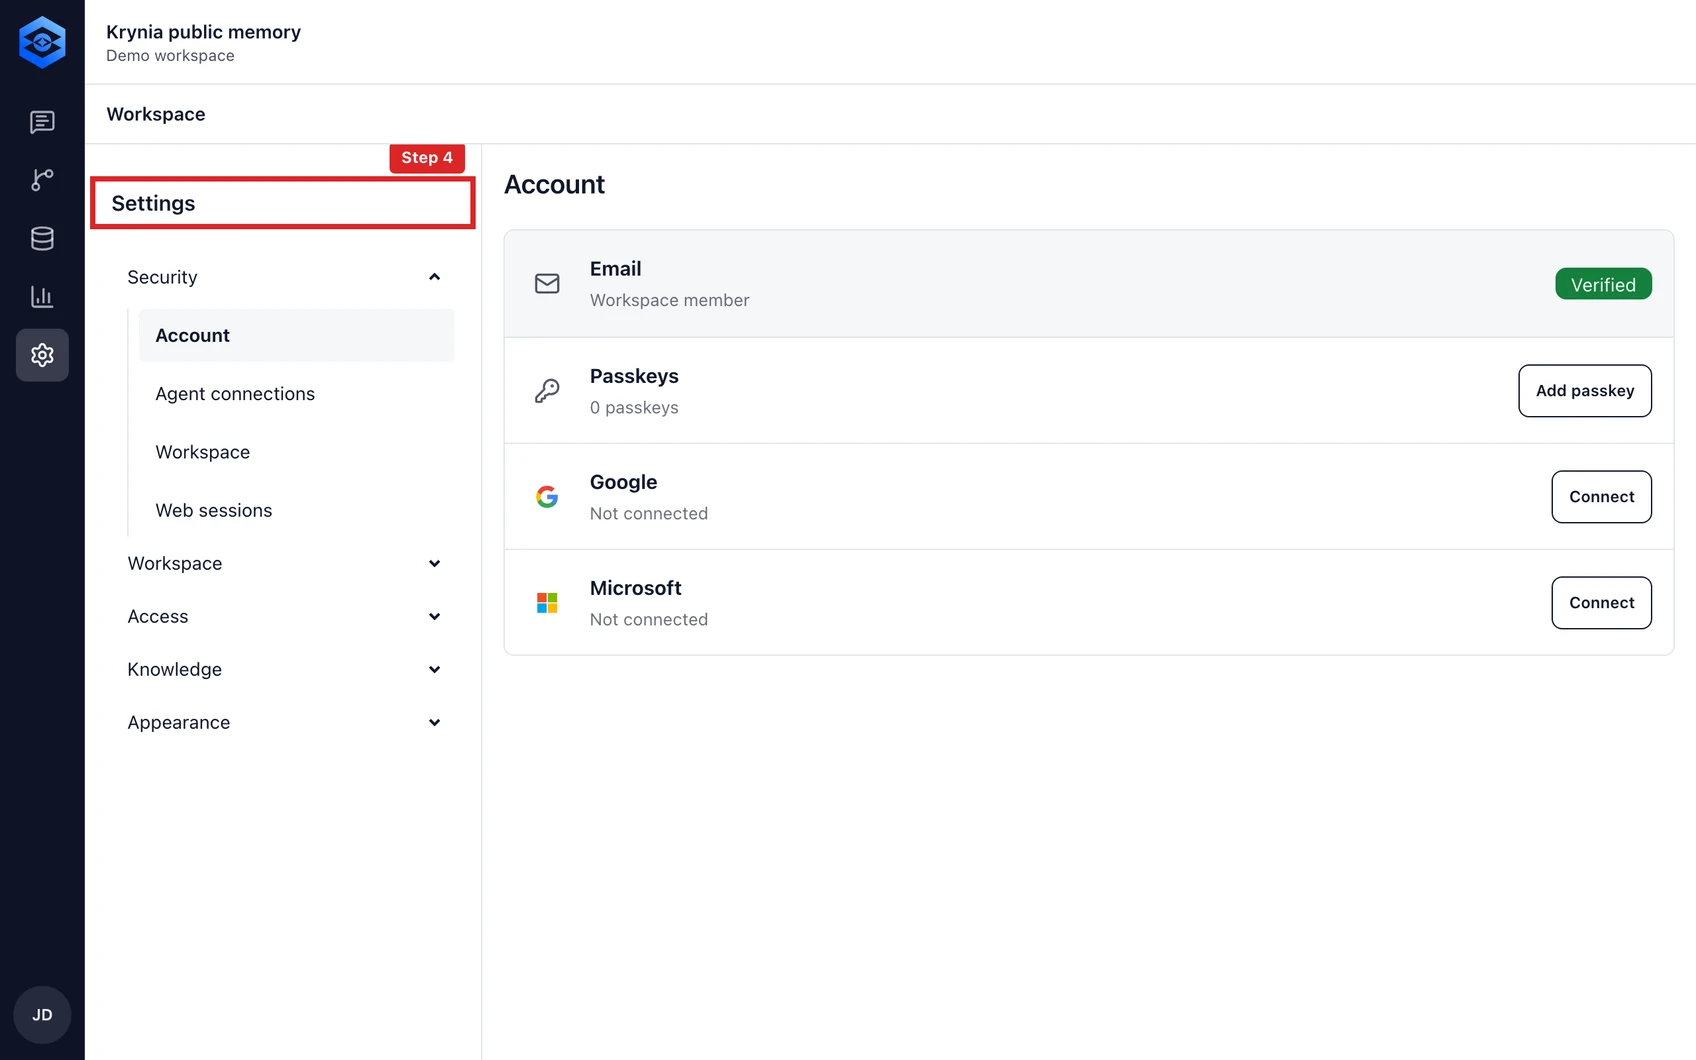
The red outline shows the control or area used in this step. - 5
Invite one teammate and verify that their role matches the sources they should see.
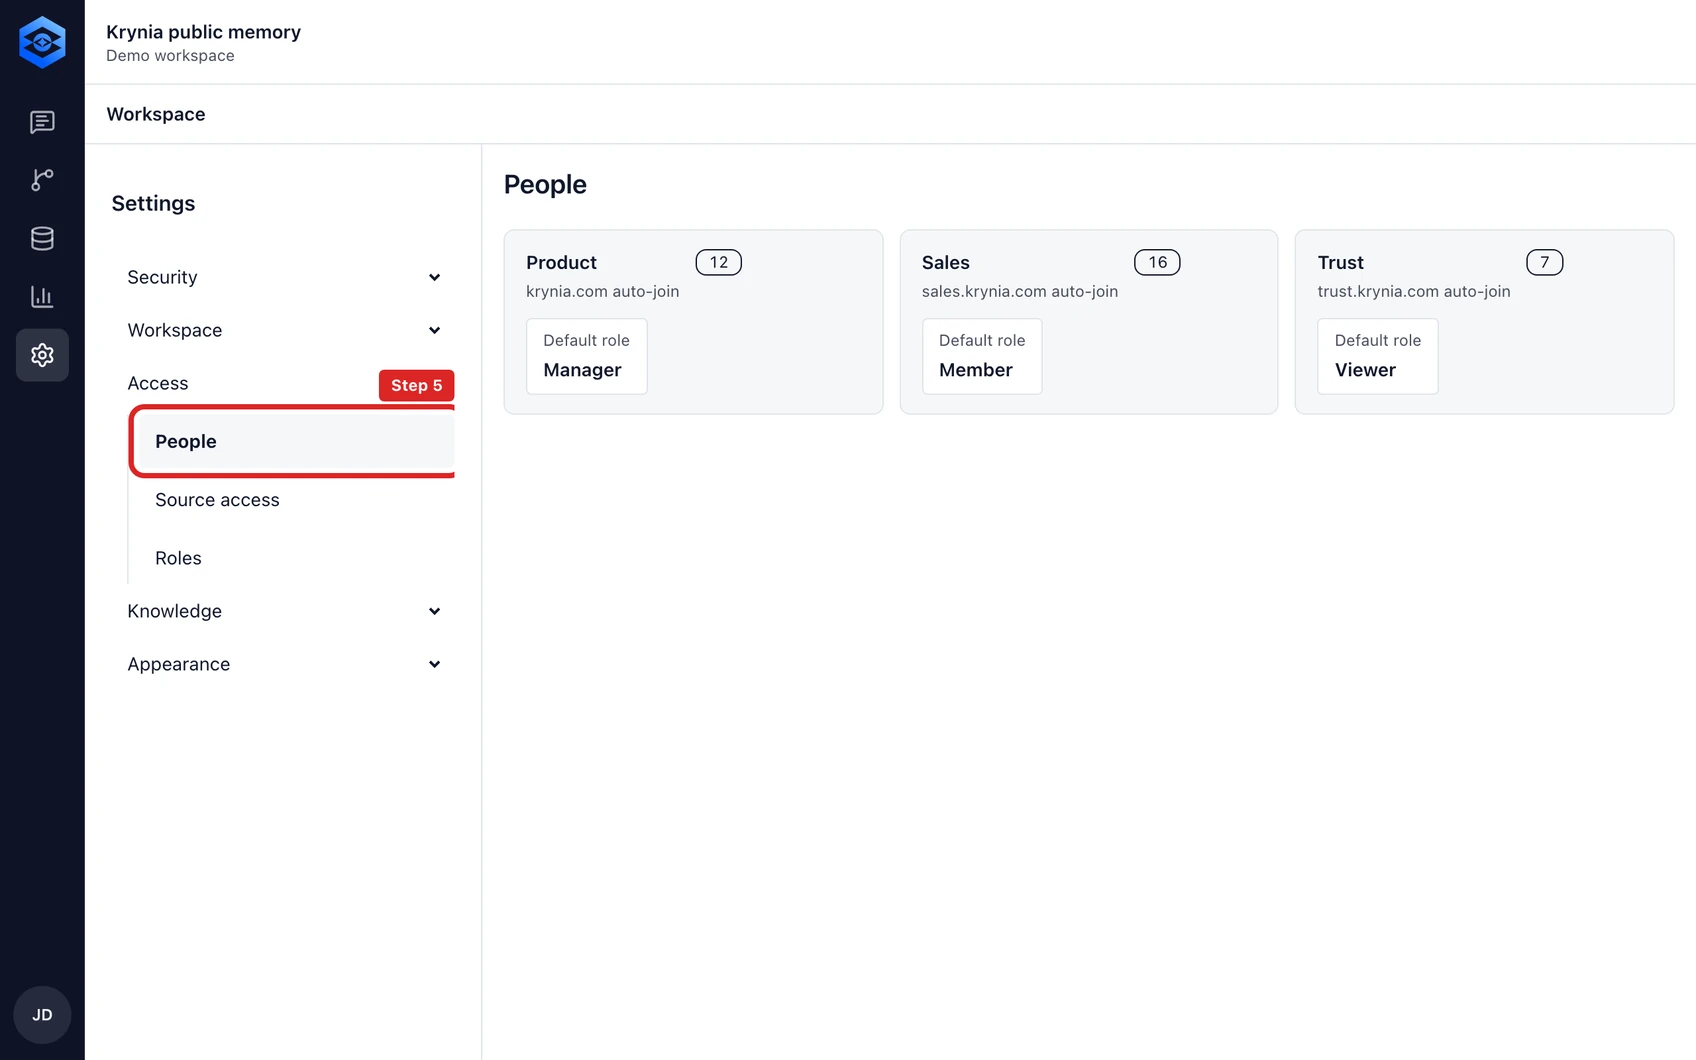
The red outline shows the control or area used in this step.


The public demo is separate. It never becomes your workspace and its example content is not copied into billing or usage.